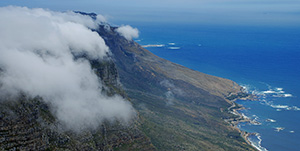
As you might be aware, I went on vacation to South Africa in February with my family to celebrate my mom’s birthday. There’s not need to focus on numbers — or at least that’s what she would say ;) — but let’s just say that it was her 3Cth (hex) birthday. Anyhow, I’ve finished processing the photos from my trip to South Africa and I’ve posted those at Flickr.
I was also pleased to be able to make use of my new camera, a Nikon D80 that I had bought just a few weeks beforehand. I went with the 18 - 135 mm kit lens at the time and it worked out great. I’ll probably buy a faster lens at some point (this one is F3.5 - 5.6) — or maybe even one of those fancy vibration reduction lenses — but I wasn’t about to start dropping big money on accessories right after the purchase of the body & kit lens.
I was away for about two weeks and I took 110 shots. I selected about 60 of those to process and, in doing so, whittled down the list to 35. It’s not that I don’t like processing photos — once I get going, I find that it can have an almost zen-like quality — but some of them just didn’t work out for one reason or another. Most often, one of those reasons was that I ended up blowing out my highlights for one reason or another. Put another way, once you hit pure white (255, 255, 255), you’ve lost all color information for that pixel and even if the image as a whole is darkened (such as to correct exposure), that pixel can only become grayer.
For example, if you’re taking a shot from within a darkened restaurant that happens to include one of its windows, you’ll probably end up with a big ol’ block-o-white where that window would be since the camera is attempting to set its exposure based on the rest of the (darkened) scene. Or, in my case, you might be taking some shots from within a museum that happens to include a handful of skylights (to name just one example). Dangit. I guess when your colorspace has “only” 256 shades of gray, there’s not much you can do. (Maybe shooting RAW might help?)
PS I offer a tip of my hat to Scott Kelby’s book, “The Photoshop CS2 Book for Digital Photographers” — though I’ve been making use of image editors for years, I hadn’t extensively used Photoshop up until I started processing these photos. The book is very down-to-earth and has screenshots every step of the way; I recommend it highly.
Standard photo-entry text: All my photos are released under a Creative Commons license which roughly states that you’re free to “copy, distribute, display, and perform the work”. Also, I’ve resized all the images to 1024-width before uploading them as it can be a bit hard to get your head around a full 10.2 MP image. However, if you want the full-resolution version of any images, just ask.